This year, one of my roommates started baking bread from scratch. She mastered the crusty, golden loaf and every house dinner we had was graced with a pan of freshly-baked bread straight from the oven. When she went home for winter break I knew I had to take matters into my own hands.
I decided to search for a focaccia recipe to satisfy my cravings. I choose focaccia for its baking ease and usage versatility. Focaccia bread that is chopped, tossed with olive oil and lightly toasted can give you the perfect croutons to top your salads, and you can offer slices as a side for any course. The flat, rectangular shape of a focaccia loaf makes it easy to decorate with toppings such as roasted tomatoes, caramelized onions, pesto or even just a simple drizzle of olive oil.
I found a recipe for no-knead focaccia bread from “Bon Appetit,” the notable recipe and food magazine. I love this recipe, and I’ll be sharing my simplified version below, but feel free to check out the original from the website for more detail.
Prep time: 6 minutes
Total time: around 8 hours
Ingredients
5 cups of all-purpose flour
2 1/4 teaspoons active dry yeast
2 teaspoons honey
1 tablespoon kosher salt
5-6 tablespoons extra virgin olive oil
2 1/2 cups of lukewarm water
Salt, optional
Cracked pepper, optional
Dried rosemary, optional
Steps
1. Measure out 2 teaspoons of honey and add to a large metal mixing bowl. If your honey is too thick and hard to work with, run it under hot water for a few seconds. I like to clean off my honey teaspoon in the 2 1/2 cups of lukewarm water I have set aside to make sure no honey is wasted or stuck on my hands.
2. Add one package of active dry yeast, around 2 1/4 teaspoons, to the bowl with the honey. Pour the lukewarm water into the bowl, and combine the mixture with a whisk. Allow this mixture to sit for about 5 minutes or until you can see carbon dioxide bubbles forming on the top of your mixture. If no bubbles are seen after around 5 minutes, your yeast may be unusable and you should start this process — known in the culinary world as “blooming” — again.
3. While your yeast is blooming, add 5 cups of all-purpose flour to another large metal bowl. To cut down on time and mess, I’ve been using a baking scale instead of a measuring cup to get the perfect 625 grams of flour in my bowl.
4. Add a tablespoon of salt to the flour and stir.
5. Add your dry ingredients to your wet ingredients slowly. I like to add about a third of my dry ingredients at a time, mixing with a rubber spatula in between. After all of your dry ingredients are added, keep mixing. This may take a bit of elbow grease, but your batter will soon start to come together into a cohesive ball of dough with no dry streaks of flour.
6. Add 4 tablespoons of olive oil to a large metal mixing bowl. Add your ball of dough into the bowl with the olive oil, turning the dough to thoroughly coat it.
7. Cover the bowl with saran wrap and set it somewhere warm like by a space heater or radiator. Let the dough proof for four hours until it is double or almost triple in size — in other words, leave your dough alone so the yeast can work its magic.
8. After four hours have passed, remove the saran wrap. Take two forks and fold from the edge of the dough into the center. Rotate the bowl a third of the way and repeat this eight more times. Your goal with this fork-folding is to knock some of the air out of the dough and re-shape it into a ball.
9. Take a 9x13 inch baking dish or metal pan, and grease the bottom and sides with butter. Add an additional tablespoon of olive oil to the middle of the pan.
10. Dump your dough ball into the greased pan, making sure any extra olive oil from the bowl follows it in.
11. Return the pan to a warm spot and allow it to rise uncovered for another 3 to 4 hours. I know mine is ready when the dough completely fills the baking pan.
12. 10 minutes before your second proof is done, preheat the oven to 450 degrees Fahrenheit.
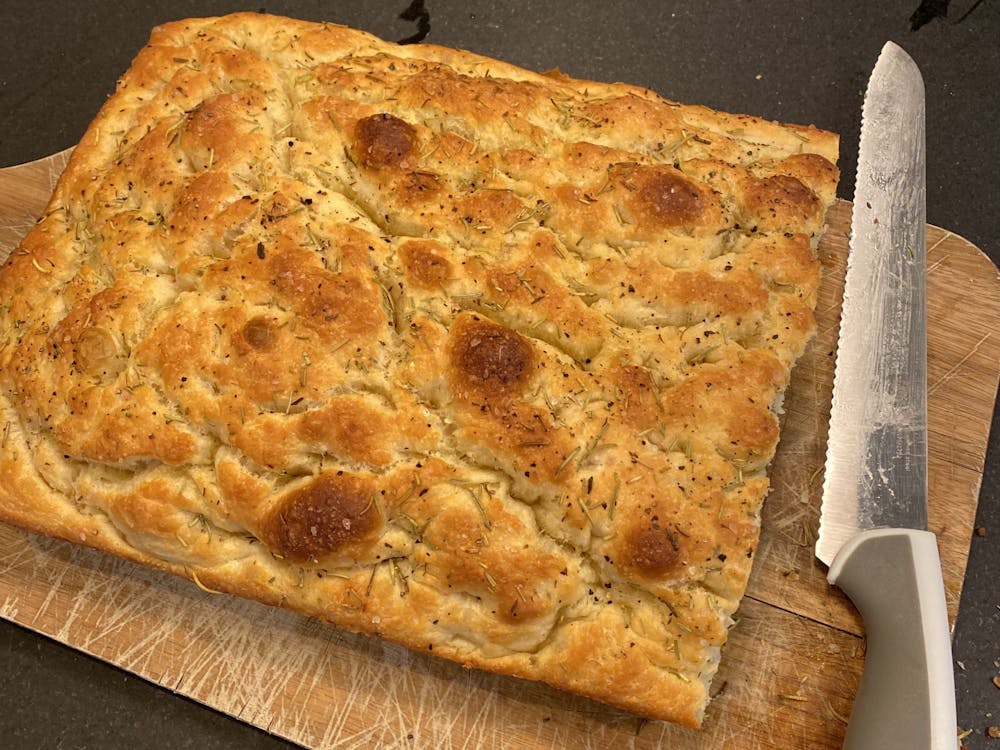
13. After 3 to 4 hours are up, take your dough and cover liberally with salt, cracked pepper and rosemary, if desired. Then — after washing your hands — dimple the focaccia all over, pressing your fingers all the way down to the bottom of the pan without piercing the dough. The focaccia should be dimpled all over with no big air bubbles or flat spaces remaining. After dimpling, season the focaccia lightly with more salt, rosemary and an extra drizzle of olive oil. At this point you can also decorate your focaccia now with other dried herbs, olives, tomatoes, asparagus, basil, sage, dried apricots or anything else you desire.
14. Pop your beautiful focaccia into the middle rack of the oven for 19 to 22 minutes. I like to cook mine for 12 minutes, and then turn the bread so the side that was facing the oven window is now facing inwards. Let cook for another 8 minutes to ensure an even crisp.
15. You’ll know your focaccia is done when it is crispy, golden brown and falls right out of the pan.
This focaccia is best served fresh and hot with a little bit of butter or olive oil. It also keeps well covered for a few days in the fridge or freezer. I love making a big turkey sandwich with whole grain mustard, arugula and tomatoes on a piece of my toasted focaccia bread.
This focaccia quickly became a staple for all of my cheese boards as well. I love pairing it with a caprese salad or spreading on some creamy burrata cheese. The opportunities to use this fluffy focaccia bread are endless
Read More

Lessons in curating the perfect photo dump
By Astrid Cheng | 4 days agoI am living and owning my college experience, not curating, selecting or editing it according to an end-of-semester post template.

Seventy years later, Betty Phillips still looks forward to Monday
By Dana Douglas | 6 days ago“‘You just become that nurse you want to be,’” Phillips said, quoting her grandmother. “That’s what I did. I never changed my mind from nursing, not one time.”

SugarBear Ice Cream: A sweet addition to Charlottesville's food scene
By Lucy Larsen | July 21, 2026In a city famous for what is on the menu, SugarBear convinced me to save room for dessert.